Well, well, well. I see you're back for more. I knew you would want to see my victory lap as this is the last installment of the "In Your Face Fabric Lady" **series. Don't worry, I'll have more creative blog posts in the future, but this is the last project I made with the stuff that I bought from that particular Jo-Ann Fabric shopping trip and burlap was one of the fabrics that the Fabric Lady cut for me.
This project all started with our friends Paul and Brooke Berg. For a wedding shower gift, they bought us a black frame that held twelve 4x6 photos and I put our wedding pictures in that frame. When we moved from Minneapolis to Cincinnati, I had unpacked all our frames and had them resting against our hutch. One morning before church, I accidentally knocked the Berg frame over and the glass broke. I immediately started crying because even though it could be replaced, when I looked at that frame, I always thought of Brooke and Paul and I was really missing our good friends. Anyway, Troy gave me a big hug, we swept up the glass and replaced the frame, but I kept the original frame without the glass because I just knew I could do something crafty with it.
I saw on Pinterest that someone had wrapped the inside of a picture frame in burlap and then put their initial in the middle of the frame. I thought that was so cute and I love monogrammed stuff, so I thought I would make my own with the Berg frame. First I removed the dividers for all the pictures. (Don't worry, I saved it in case it comes in handy for a future craft project!) Then I opened up the back of the frame and took out the cardboard insert. I took my burlap and wrapped it around the cardboard and then stapled the burlap into place along the edges of the cardboard. This was a little bit tedious. I had to remove staples and then re-staple in some places after pulling the fabric to make sure it would be tight.
 | |||
| The back doesn't have to look pretty. It gets covered up, but you get the idea. |
I put the backing back on but when I flipped the frame over, I realized that even though I stapled the burlap as close to the edge of the cardboard as possible, you could still see some of the staples and that drove me crazy. You should have seen me assess this problem. I literally put the frame on my desk and walked past it a bunch of times to see if it was noticeable. It was. I had left over cord rope from my nautical flags project, so I decided to hot glue the rope along the edges and then tie a knot in the middle where the ends meet. I loved how it turned out! Good thing those staples were being stubborn! Otherwise, I wouldn't have even tried the rope! See, sometimes mistakes can be awesome and lead to cool realizations. (Cue the Full House, "we have fixed all of life's problems" music)
 |
| I love me some nautical rope! |
I bought a large wooden letter 'C' (for Carlson, obviously) and then a small wooden plaque. Unfortunately, I didn't take pictures of these next steps so you're going to have visualize with me. First I painted both the 'C' and the plaque black. Then on the plaque, I used scrapbook stickers and put "est. 2007" (that was the year the hubs and I got married.) I wanted the wooden signs to look a little distressed, so then I painted both of them white. That's right, I painted right over the stickers. I was a little nervous how the plaque would look when I pulled the stickers off because they looked like they weren't going anywhere after being painted. However, the stickers were easy to take off using a pair of tweezers. Then I lightly sanded both the letter 'C' and the plaque. You only need to sand in areas where you want the background color to show through. After I distressed the plaque, I realized that the lettering didn't pop as much as I would like. So I got a very thin paintbrush and painted the letters black so they would pop.
 |
| All distressed and ready to go. |
After the wooden pieces were dry, I placed them on my burlap frame, but I felt like there was too much negative space. The project needed something else. I decided to paint our last name on the burlap and then have the wooden pieces glued above and below the name. However, I already hot glued the rope to the frame, so I really couldn't mess up. I decided I should do a practice run to see how the letters would turn out. I cut a small piece of burlap and sponged my paint over the stencil. When I pulled the stencil off, I thought it looked great and was ready to proceed to the real deal.
 |
| This picture is brought to you by the letter 'A' |
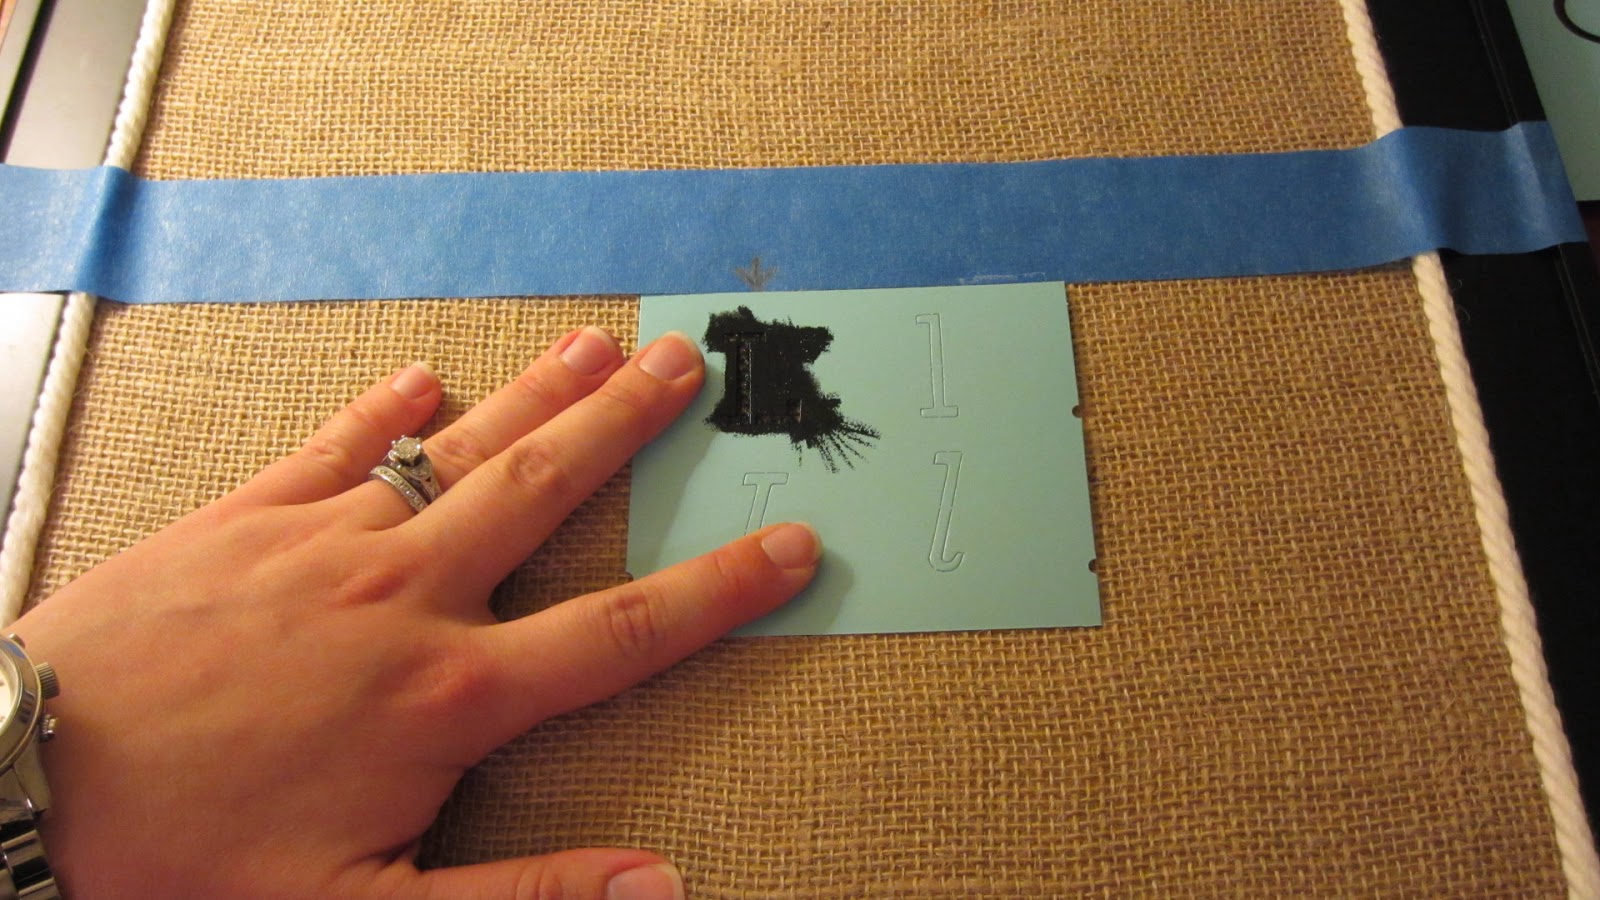
I grabbed my trusty blue painter's tape and put a long piece of tape going horizontally along my frame where I wanted my letters to be. This was going to be my guide. I always lined up the top part of my stencils with this piece of tape. I measured the frame and found the middle, so I started with the letter that was in the middle of our name, 'L.' I thought it would be easier to work out both sides to ensure the name would be center.
 |
| Maybe I have a future as a hand model? |
I took a sponge brush and sponged black acrylic paint over the stencil and then slowly peeled the stencil off the burlap. I let the letter mostly dry before I painted the next letter; it doesn't really take too long because you aren't saturating the burlap with the paint. For the rest of the letters, I wanted to make sure there would be good spacing. I would put the stencil under the painted letters to see how closely I wanted the letters to be. Then I would put a little tick mark on the top of the stencil and then carefully follow an imaginary line up to the blue painter's tape and put another tick mark on the tape. Then I would bring the stencil up to the tape and match the tick marks. Be sure that you pick the stencil up and not drag it up because you don't want to smear any paint that may not have dried on a previous letter.
 |
| Matching the tick marks to make sure there is even spacing between letters. |
After I finished all my letters, I took a minute to exhale because this whole time I was sort of holding my breath. I was nervous that the lettering wouldn't look good and I had already stapled the burlap and hot glued the rope to the frame, so I had little wiggle room for mistakes, like none. I liked the outcome! I plugged in my trusty hot glue gun and glued the wooden 'C' and the plaque to the burlap.

I loved it! I thought my final product turned out even better than what I had seen on Pinterest! I hung that bad boy up in our foyer and then took a picture and sent it to my sister, Laura who agrees that this craft was the bomb-diggity.The Berg frame has been reborn! Hurray!

Wow, I feel like so much has happened since the Fabric Lady openly challenged me to a craft off. (I may have made that up in my mind.) So many crafts; so much sewing, so much paint, so much fun. With that, friends, I would say it's time to put up the final score and run a few victory laps.
Pam 4, Fabric Lady 0 . . . . . Boom-Sha-ka-la-ka!
Fabric, Glue and Macaroni
In Your Face Fabric Lady (Part I - Pennant Bunting)
In Your Face Fabric Lady (Part II -Nautical Flags)
More Nautical Nursery Decor
No comments:
Post a Comment